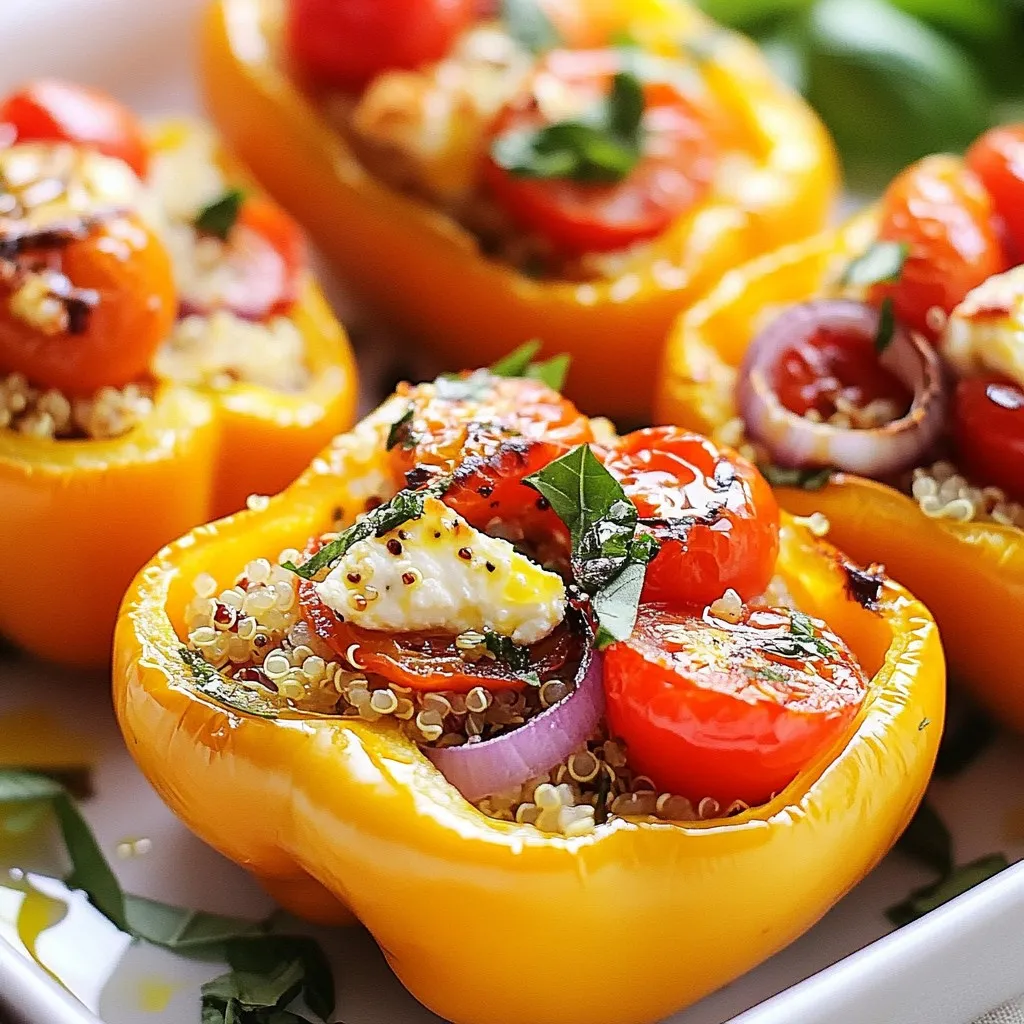
Are you craving a meal that’s both tasty and simple? Baked Feta Stuffed Peppers check both boxes! With vibrant bell peppers filled with creamy feta, quinoa, and fresh veggies, this dish is a real treat. Whether you’re new to cooking or a seasoned pro, I’ll guide you through making this colorful, healthy dish. Let’s dive into the simple steps and delicious flavors that await you!
Why I Love This Recipe
- Vibrant Colors: The variety of bell pepper colors not only makes the dish visually appealing but also adds a delightful crunch and sweetness to each bite.
- Cheesy Goodness: The creamy feta cheese melts beautifully, adding a rich, tangy flavor that perfectly complements the earthy quinoa and fresh vegetables.
- Healthy and Nutritious: Packed with protein from quinoa and essential vitamins from peppers and tomatoes, this dish is both satisfying and good for you.
- Easy to Customize: You can easily swap out ingredients based on your preferences or what you have on hand, making it a versatile recipe for any occasion.
Ingredients
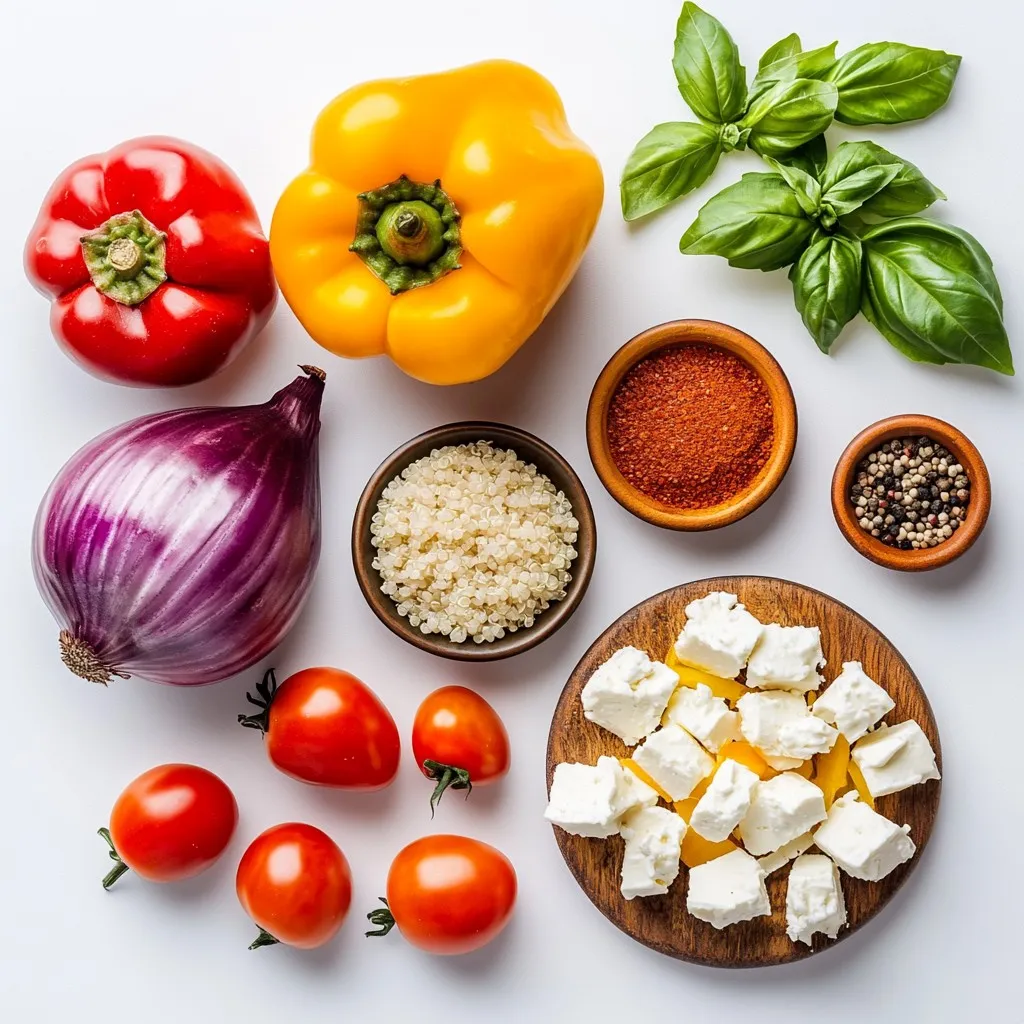
To make baked feta stuffed peppers, you need a few simple items. Here’s what you will need:
– 4 large bell peppers (any color)
– 200g feta cheese, crumbled
– 1 cup cooked quinoa
– 1 cup cherry tomatoes, halved
– 1 small red onion, finely chopped
– 2 garlic cloves, minced
– 1 teaspoon dried oregano
– 1 teaspoon paprika
– 2 tablespoons olive oil
– Salt and black pepper
– Fresh basil leaves for garnish
These ingredients come together to create a tasty meal. Each item plays a role. The bell peppers provide great flavor and a nice crunch. Feta cheese adds creaminess and tang. Quinoa gives it a hearty base. Cherry tomatoes bring sweetness, while red onion and garlic add depth. Spices like oregano and paprika enhance the dish. Finally, basil leaves give a fresh touch.
When you gather these ingredients, you set the stage for a delicious cooking experience. Make sure to choose fresh produce for the best flavor. Enjoy your time in the kitchen!
Step-by-Step Instructions
Preheat the Oven
First, set your oven to 375°F (190°C). This heat helps the peppers roast well.
Prepare the Bell Peppers
Next, take your bell peppers. Cut off the tops and remove the seeds. Stand them up in a baking dish. This makes filling them easy.
Mix the Filling
In a big bowl, combine the crumbled feta, cooked quinoa, and cherry tomatoes. Add the red onion and minced garlic. Then, mix in the dried oregano and paprika. Drizzle in the olive oil and season with salt and pepper. Stir well so each bite is full of flavor.
Stuff the Peppers
Now, take a spoon and fill each bell pepper with the mixture. Press down gently to pack it in. This helps create a hearty bite and keeps the filling from falling out.
Bake the Peppers
Drizzle a little olive oil on top of each pepper. Cover the dish with foil to keep moisture in. Bake for 25 minutes to soften the peppers. After that, remove the foil and bake for an extra 15 minutes. This will make the tops a bit crispy.
Garnish and Serve
Once baked, take the dish out of the oven and let it cool for a few minutes. Before serving, add fresh basil leaves on top. This adds a nice touch and great aroma. Serve warm and enjoy your tasty meal!
Tips & Tricks
Choosing the Right Peppers
Pick large bell peppers for this dish. They hold the filling well. Any color works, but red, yellow, or orange add sweetness. Look for firm peppers without soft spots. The thicker the wall, the better they bake.
Ensuring Flavor Balance
Mix the feta cheese and quinoa well. Use fresh herbs like basil for aroma. The cherry tomatoes add sweetness, while the onion gives depth. A pinch of salt and pepper boosts all the flavors. Balance is key for a tasty bite.
Packing the Filling Tight
When filling the peppers, pack the mixture tightly. This keeps the filling from shifting while baking. Use a spoon to press down gently. A snug fit means every bite is full of flavor. Avoid leaving empty spaces inside the peppers.
Preventing Over-baking
Cover your baking dish with foil for the first part of baking. This traps moisture and keeps the peppers tender. Remove the foil later to let the tops brown. Bake until the peppers are soft but not mushy. Check for a slight char for the best taste.
Pro Tips
- Choose Colorful Peppers: Using a mix of colorful bell peppers not only enhances the visual appeal of your dish but also adds a variety of flavors.
- Experiment with Cheese: While feta is traditional, feel free to mix in other cheeses like goat cheese or mozzarella for a different taste profile.
- Make Ahead: You can prepare the stuffed peppers a day in advance and keep them in the refrigerator. Just bake them when you’re ready to serve!
- Serve with a Sauce: Drizzle some balsamic glaze or a yogurt sauce over the stuffed peppers for added flavor and a gourmet touch.
Variations
Vegetarian Options
You can keep this dish vegetarian and still make it exciting. Swap quinoa for rice or farro. Add black beans or chickpeas for more protein. Toss in extra veggies like spinach or zucchini for a colorful mix. You can also use different herbs, like parsley or thyme, to change the flavor.
Meat Additions
For meat lovers, ground turkey or beef works well. Cook the meat before mixing it with the other filling ingredients. You can also use shredded chicken. This adds a hearty touch and makes the meal more filling.
Different Cheeses
Feta is great, but you can try other cheeses too. Goat cheese adds a creamy texture. Mozzarella gives a nice meltiness. For a stronger flavor, try blue cheese or sharp cheddar. Mixing different cheeses can create a unique taste.
Spice Level Adjustments
Want some heat? Add red pepper flakes or diced jalapeños to the filling. You can also drizzle sriracha on top before serving. If you prefer mild flavors, skip the spices and focus on herbs for a fresh taste. Adjust the spice to fit your taste buds and enjoy!
Storage Info
Storing Leftovers
After you enjoy your Baked Feta Stuffed Peppers, store leftovers in an airtight container. Keep them in the fridge for up to four days. This way, you can savor the tasty flavors again without any fuss.
Reheating Instructions
To reheat, preheat your oven to 350°F (175°C). Place the stuffed peppers on a baking sheet. Cover them with foil to keep them moist. Bake for 15-20 minutes or until heated through. You can also microwave them for a quick option. Just heat on a microwave-safe plate for 2-3 minutes, checking often.
Freezing the Stuffed Peppers
You can freeze stuffed peppers for later. First, let them cool completely. Wrap each pepper tightly in plastic wrap. Then, place them in a freezer-safe bag. They stay good for up to three months. To cook, thaw overnight in the fridge, then reheat as above. Enjoy a quick and easy meal anytime!
FAQs
Can I use other grains besides quinoa?
Yes, you can use other grains. Rice, couscous, or farro work well too. Just make sure they are cooked before mixing. Each grain brings a new taste and texture to the dish.
How do I make this dish gluten-free?
To make this dish gluten-free, use gluten-free grains like quinoa or rice. Also, check the feta cheese label. Most feta is gluten-free, but it’s always good to confirm.
Can I prepare the stuffed peppers in advance?
Yes, you can prepare the stuffed peppers ahead of time. Stuff them and cover them in the fridge. Bake them when you are ready to eat. This saves time on busy days.
What can I serve with Baked Feta Stuffed Peppers?
You can serve them with a green salad for a fresh touch. A side of crusty bread also pairs nicely. For a heartier meal, add roasted vegetables or a light soup.
How do I know when the peppers are done baking?
When the peppers are tender and the tops are slightly charred, they are done. A fork should easily pierce the pepper. This ensures they are soft and ready to enjoy.
Baked feta stuffed peppers are a simple, tasty dish. You learned how to pick peppers, mix a great filling, and bake them just right. We covered fun variations and tips to avoid common mistakes.
These peppers are not only good but also easy to make. Try them for lunch or dinner. You can even store leftovers for later. Enjoy the vibrant flavors and make this dish your ow