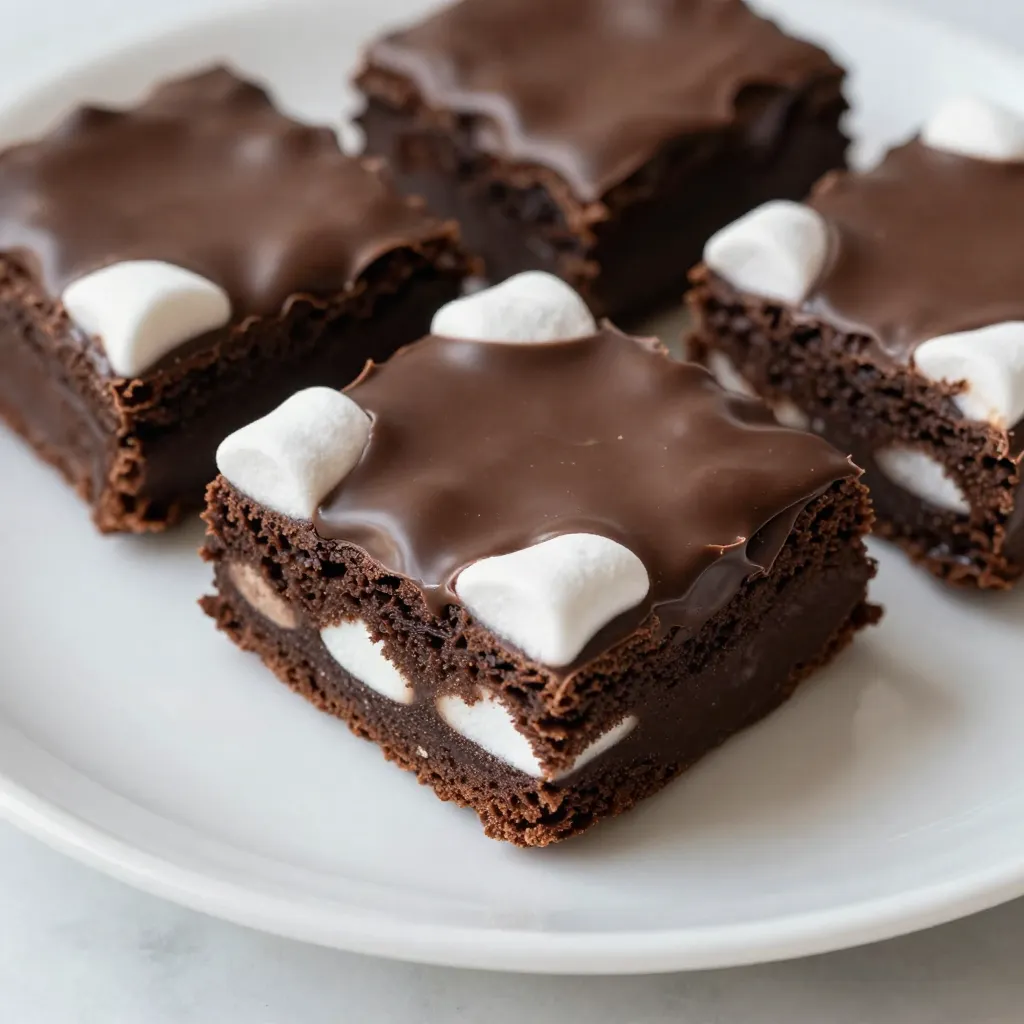
If you love the blend of chocolate and marshmallow, you’re in for a treat! Chocolate Covered Marshmallow Brownies combine rich, fudgy brownies and gooey marshmallows for a delightful dessert. These brownies are easy to make and perfect for sharing. In this post, I’ll guide you step-by-step, revealing tips, tricks, and variations to make them even more special. Let’s get started on making this sweet dream a reality!
Why I Love This Recipe
- Rich Chocolate Flavor: This recipe delivers a deep, indulgent chocolate flavor that chocolate lovers crave, complemented by the gooey marshmallows.
- Fun and Festive: The combination of brownies and marshmallows makes these treats perfect for celebrations, bringing joy to any gathering.
- Easy to Make: With straightforward steps and simple ingredients, this recipe is perfect for bakers of all skill levels, ensuring delicious results every time.
- Customizable: You can easily adapt this recipe by adding nuts, different types of chocolate, or seasonal toppings for a unique twist.
Ingredients
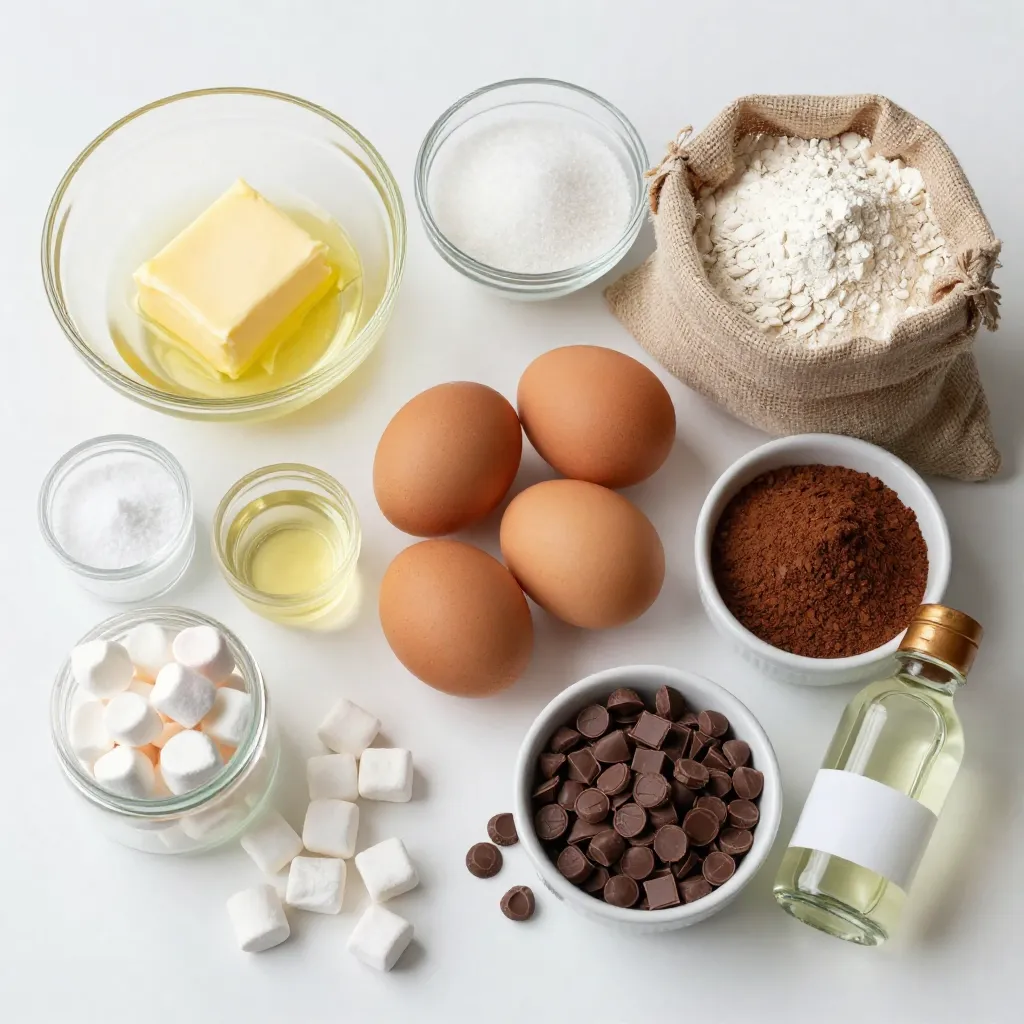
To make delicious chocolate covered marshmallow brownies, gather these ingredients. Each one plays a key role in creating this treat.
– 1 cup unsalted butter, melted
– 2 cups granulated sugar
– 4 large eggs
– 1 teaspoon vanilla extract
– 1 cup all-purpose flour
– 1 cup unsweetened cocoa powder
– 1/2 teaspoon baking powder
– 1/4 teaspoon salt
– 2 cups mini marshmallows, divided
– 1 cup semi-sweet chocolate chips
– 1 tablespoon coconut oil (for the chocolate coating)
These ingredients are simple but powerful. The unsalted butter and sugar form a rich base. Eggs add moisture and a fluffy texture. Cocoa powder gives that deep chocolate flavor we all love. The marshmallows? They create a sweet, gooey surprise in every bite!
When you blend these ingredients well, you set the stage for a treat that pleases any crowd. Make sure you have everything ready before you start. That way, you can focus on mixing, baking, and enjoying the fun of creating these brownies.
Step-by-Step Instructions
Preheat and Prepare
First, preheat your oven to 350°F (175°C). Grease a 9×13 inch baking dish with butter. You can also line it with parchment paper for easy removal later. This step helps your brownies bake evenly.
Mix Wet Ingredients
In a large bowl, add 1 cup of melted butter and 2 cups of granulated sugar. Whisk them together until smooth. This mixture should look shiny and well combined.
Incorporate Eggs and Vanilla
Now, add 4 large eggs one at a time. Mix well after each egg. Then, stir in 1 teaspoon of vanilla extract. This adds a nice flavor to your brownies.
Combine Dry Ingredients
In another bowl, sift together 1 cup of all-purpose flour, 1 cup of cocoa powder, 1/2 teaspoon of baking powder, and 1/4 teaspoon of salt. Slowly fold the dry mix into the wet mix. Stir gently until just combined. Be careful not to overmix!
Layer the Batter
Pour half of the brownie batter into your prepared dish. Spread it out evenly with a spatula. This forms the first layer of your brownies.
Add Marshmallows
Sprinkle 1.5 cups of mini marshmallows over the first layer. Save the rest of the marshmallows for later. Make sure they cover the batter well for a gooey center.
Top with Remaining Batter
Spoon the remaining brownie batter over the marshmallows. Spread it carefully, covering the marshmallows completely. This keeps the marshmallows hidden until baking.
Bake the Brownies
Place the pan in the oven and bake for 25 to 30 minutes. To check if they’re done, insert a toothpick in the center. It should come out with a few moist crumbs.
Marshmallow Melt
After baking, let the brownies cool in the pan for about 15 minutes. Sprinkle the reserved mini marshmallows on top. Return the dish to the oven for 5 to 7 minutes, until the marshmallows puff up and turn golden.
Prepare the Chocolate Coating
While the brownies cool, melt 1 cup of semi-sweet chocolate chips with 1 tablespoon of coconut oil. Use a microwave-safe bowl and heat in 30-second bursts. Stir until smooth and shiny.
Finish the Brownies
Once the brownies are cool, pour the melted chocolate over the top. Use a spatula to spread it evenly over the marshmallows. This creates a beautiful, glossy finish.
Set and Serve
Let the chocolate set in the fridge for about 30 minutes. After it hardens, remove the brownies from the pan. Cut them into squares and enjoy!
Tips & Tricks
Ingredient Substitutions
You can swap some ingredients if needed. Use margarine instead of butter. For a lighter option, swap granulated sugar for coconut sugar. You can also use egg substitutes like flaxseed meal or applesauce. If you want gluten-free brownies, try almond flour in place of all-purpose flour.
Perfecting the Texture
For soft brownies, mix the wet and dry ingredients just until combined. This helps keep them light and moist. If you prefer fudgy brownies, add an extra egg. For a cake-like texture, mix a bit longer and use less cocoa powder.
Serving Suggestions
These brownies shine when served warm. Top them with vanilla ice cream for a tasty treat. You can also drizzle extra chocolate sauce on top. For a fun touch, add sprinkles or crushed nuts. Enjoy them with a glass of cold milk or coffee!
Pro Tips
- Use Room Temperature Eggs: For a smoother batter, let your eggs sit at room temperature for about 30 minutes before mixing. This helps them incorporate better with the other ingredients.
- Don’t Overmix the Batter: When combining wet and dry ingredients, mix until just combined to keep your brownies soft and fudgy. Overmixing can lead to a tougher texture.
- Experiment with Toppings: Feel free to add extra toppings like crushed nuts, chocolate sprinkles, or even a drizzle of caramel on top of the chocolate coating for added flavor and texture.
- Cool Completely Before Cutting: Allow the brownies to cool completely before slicing to ensure clean cuts and prevent them from falling apart.
Variations
Adding Nuts or Other Mix-Ins
You can make these brownies even better by adding nuts. Chopped walnuts or pecans give a nice crunch. You can mix in about 1 cup of nuts into the batter. This adds a great texture and flavor. If you want to be creative, try adding crushed cookies or candy bars. They will melt and give a surprise in every bite!
Alternative Chocolate Coatings
If you want to change the flavor of your brownies, use white chocolate instead. Just melt it with coconut oil, just like the semi-sweet chocolate. You can also use dark chocolate for a bolder taste. Try adding a sprinkle of sea salt on top for a sweet and salty combo. This can make your brownies stand out even more.
Gluten-Free Options
For a gluten-free treat, swap the all-purpose flour for almond flour or gluten-free flour. This will make the brownies soft and chewy. Be sure to check the baking powder is gluten-free too. You can still enjoy all the fun flavors without gluten in your brownies.
Storage Info
Best Storage Practices
To keep your chocolate covered marshmallow brownies fresh, store them in an airtight container. Use parchment paper to separate layers. This will help prevent sticking and keep them moist. Place the container in a cool, dry place away from sunlight. If you live in a warm area, consider refrigerating them.
Freezing Instructions
You can freeze these brownies if you want to save some for later. First, let the brownies cool completely. Then, cut them into squares and wrap each piece in plastic wrap. Place the wrapped brownies in a freezer-safe bag. They can last up to three months in the freezer.
How Long They Last
When stored properly, these brownies last about five days at room temperature. In the fridge, they may stay good for up to a week. If frozen, they are best when eaten within three months. Just remember to thaw them in the fridge overnight before enjoying!
FAQs
Can I make these brownies ahead of time?
Yes, you can prepare these brownies in advance. Bake them and let them cool fully. Then, store them in an airtight container. They stay fresh for up to five days. You can also freeze them for longer storage. Just wrap them tightly. Thaw them in the fridge before serving.
How do I know when the brownies are done?
To check if the brownies are done, insert a toothpick into the center. If it comes out with a few moist crumbs, your brownies are ready. If it comes out clean, they may be overbaked. The edges should pull away slightly from the sides of the pan.
What can I use instead of mini marshmallows?
If you don’t have mini marshmallows, try using marshmallow fluff. You can also use large marshmallows cut into smaller pieces. Another option is using a marshmallow cream that can melt well. These substitutes will still give you a sweet, gooey center.
Can I use different types of chocolate for the coating?
Yes, you can use various types of chocolate for the coating. Dark chocolate will give a richer taste. Milk chocolate will add extra sweetness. You can even try white chocolate for a fun twist. Just ensure to adjust the coconut oil for smooth melting.
How to reheat brownies for the best texture?
To reheat brownies, use the microwave for short bursts, around 10 seconds at a time. This keeps them soft and gooey. You can also warm them in an oven at 350°F (175°C) for about 5 minutes. Cover them with foil to prevent drying out. Enjoy them warm for the best flavor!
You now have a thorough guide for delicious brownies. We covered the essential ingredients, step-by-step instructions, and tips for success. You can try fun variations and learn the best ways to store them. Remember, experimenting with flavors can make these brownies even more exciting. Enjoy making and sharing these treats, perfect for any occasio