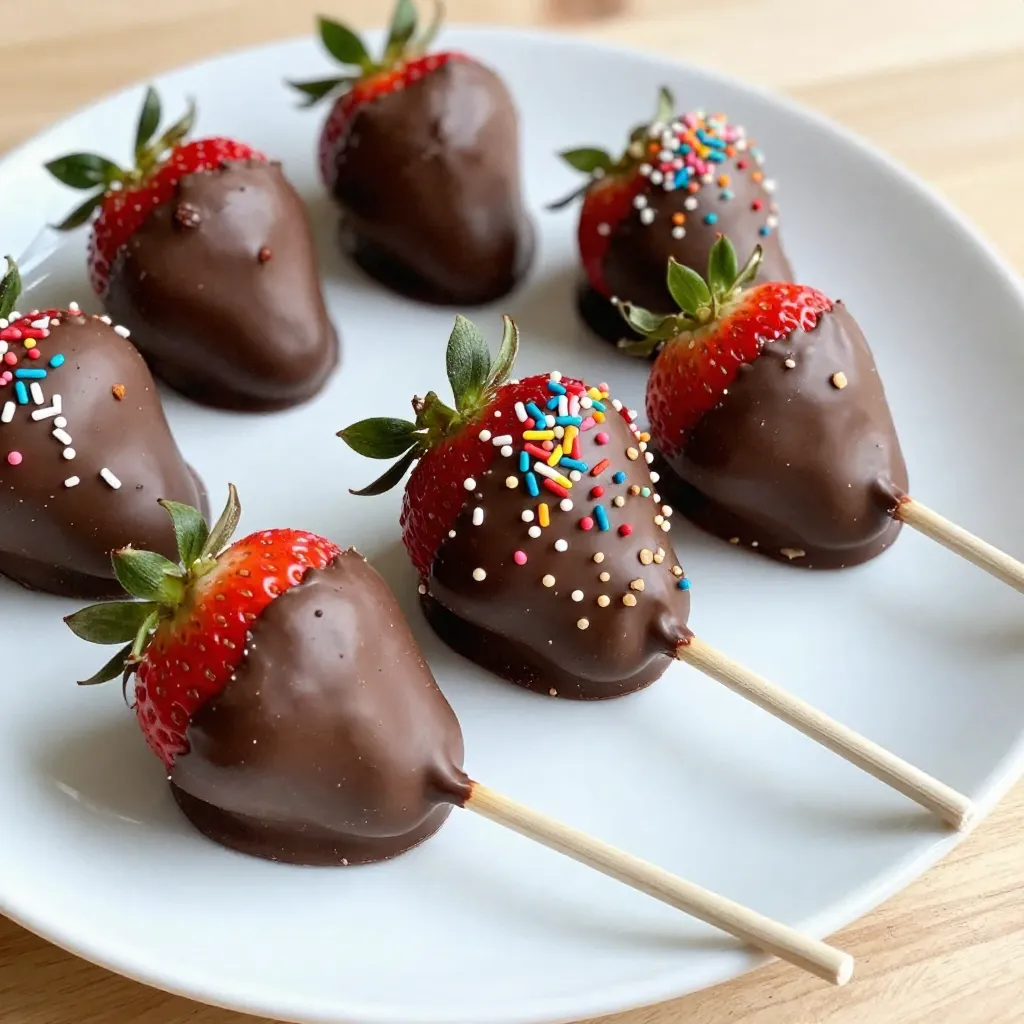
Looking for a simple and fun treat that wows every time? Chocolate Covered Strawberry Pops are the perfect choice! You’ll love how easy it is to make these sweet delights. Whether you’re hosting a party or just want a tasty snack, I’ll show you how to create these yummy pops step-by-step. Let’s dive in and explore the fun world of chocolate-dipped strawberries!
Why I Love This Recipe
- Fresh Ingredients: The use of fresh strawberries makes these pops not only delicious but also a healthy treat.
- Easy to Make: This recipe involves simple steps and minimal ingredients, making it perfect for beginners.
- Customizable: You can easily personalize these pops with different toppings like sprinkles or nuts to suit your taste.
- Perfect for Any Occasion: Whether it’s a party, holiday, or just a sweet craving, these strawberry pops are always a hit!
Ingredients
Main Ingredients List
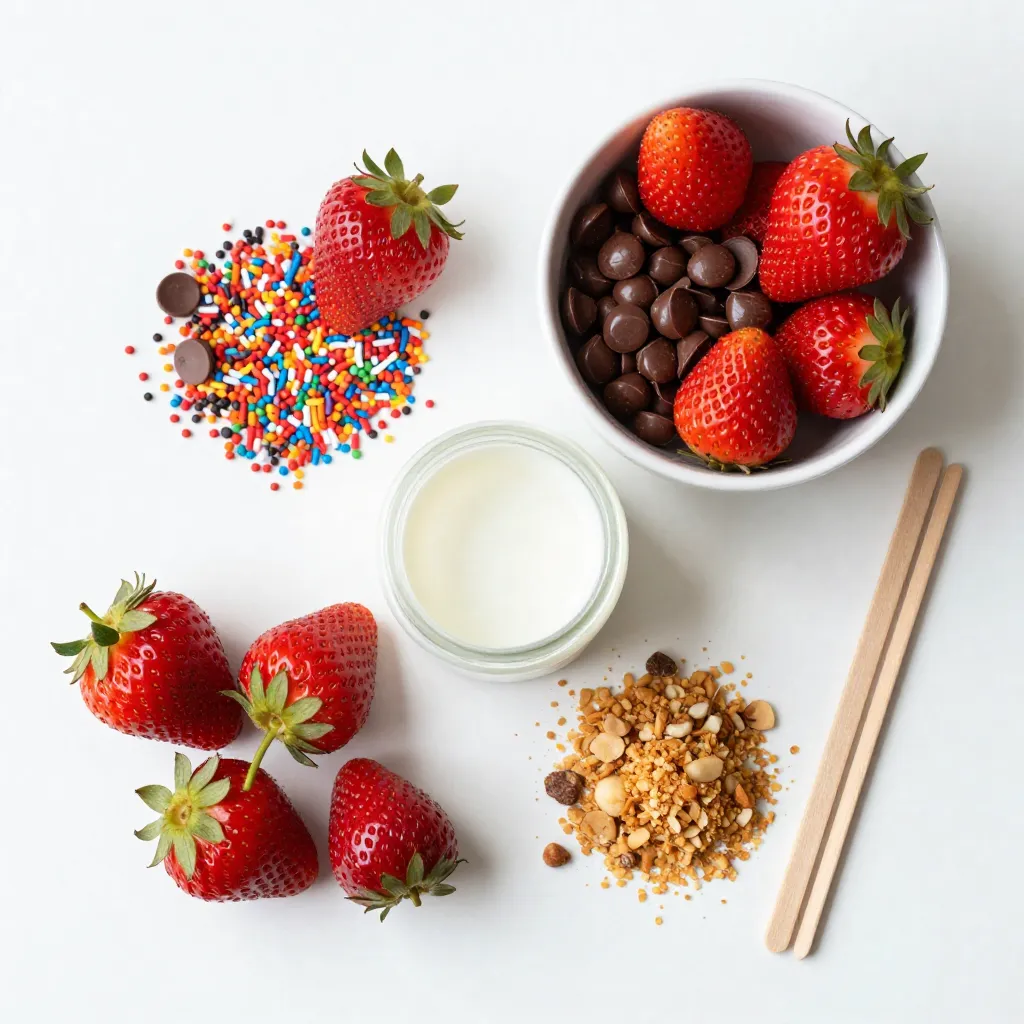
– 1 pound fresh strawberries, thoroughly washed and dried
– 8 ounces semi-sweet chocolate chips
– 2 tablespoons coconut oil
– Lollipop sticks or wooden skewers
Optional Decorations
– Sprinkles or crushed nuts
Necessary Equipment
– Microwave-safe bowl
– Baking sheet
– Parchment paper
– Paper towels
These ingredients make up the base for your chocolate-covered strawberry pops. The strawberries should be firm and ripe for the best flavor. Semi-sweet chocolate chips melt well and create a rich coating. Coconut oil adds a nice shine to the chocolate.
For decorations, sprinkles or nuts add fun colors and crunch. Use lollipop sticks or wooden skewers to hold the pops. This simple list keeps the process clear and fun. Enjoy gathering your ingredients!
Step-by-Step Instructions
Preparing the Strawberries
Start with fresh strawberries. Wash them well and dry them completely. If any water stays on them, the chocolate won’t stick. Use a paper towel to gently pat them dry. Make sure to keep the green tops on; they look nice and give you something to hold.
Melting the Chocolate
Grab a microwave-safe bowl. Add the semi-sweet chocolate chips and coconut oil. The oil helps the chocolate melt smoothly. Microwave the bowl in 30-second bursts. Stir the chocolate after each burst. Keep going until it is fully melted. The chocolate should be shiny and smooth.
Assembling and Dipping the Pops
Take each strawberry and insert a lollipop stick or skewer into the top. Push it halfway down so it stays put. Hold the strawberry by the stick. Dip the strawberry into the melted chocolate. Make sure it’s fully coated, then gently shake it to let extra chocolate fall back into the bowl.
Decorating the Chocolate-Covered Strawberries
While the chocolate is still warm, you can decorate. Roll the coated part of the strawberry in sprinkles or crushed nuts. This adds a fun look and extra taste. Get creative with colors and textures.
Cooling and Setting the Pops
Next, line a baking sheet with parchment paper. Place the decorated strawberries on the sheet. Put them in the fridge for about 30 minutes. This will make the chocolate harden. Once set, your pops are ready to serve!
Tips & Tricks
Choosing the Right Strawberries
Pick ripe, firm strawberries for the best taste. Look for bright red color with green leaves. Smaller strawberries work well for pops since they are easy to hold. Avoid any with bruises or soft spots. Wash and dry them well to help the chocolate stick.
Best Chocolate Melting Techniques
Use a microwave for melting chocolate. Combine chocolate chips and coconut oil in a bowl. Heat it in 30-second bursts. Stir after each burst until smooth. This method keeps the chocolate from burning. You can also use a double boiler if you prefer.
Troubleshooting Common Issues
If the chocolate won’t stick, your strawberries might be wet. Dry them again with a towel. If the chocolate is too thick, add a bit more coconut oil. If it clumps, it may be too hot. Let it cool slightly before dipping the strawberries.
Presentation Ideas for Serving
For a fun display, use a vase or cup to hold the pops. Arrange them so they stand tall. You can also use a tiered cake stand for a fancy look. Add some decorative paper or cloth to make it pop.
Pro Tips
- Dry Strawberries Thoroughly: Ensuring your strawberries are completely dry before dipping them in chocolate is crucial for a smooth coating. Any moisture can cause the chocolate to seize or slide off.
- Use Quality Chocolate: For the best flavor and texture, opt for high-quality semi-sweet chocolate. This will enhance the overall taste of your chocolate-covered strawberry pops.
- Experiment with Coatings: Don’t just stick to sprinkles! Try using crushed cookies, coconut flakes, or even edible glitter for a unique twist on your strawberry pops.
- Store Properly: To keep your pops fresh, store them in an airtight container in the refrigerator. They should last for a couple of days, but are best enjoyed within the first 24 hours.
Variations
Different Chocolate Types to Use
You can use different types of chocolate for your strawberry pops. Semi-sweet chocolate is great, but you can also try:
– Milk chocolate for a sweeter taste
– Dark chocolate for a richer flavor
– White chocolate for a creamy twist
Each type gives a unique taste. Experimenting can make this treat even more special.
Flavor Infusions and Mix-ins
Adding flavors can really change your pops. You can mix in:
– A splash of vanilla extract for warmth
– A hint of orange zest for brightness
– A dash of sea salt for a sweet-salty combo
These infusions add depth. You can also blend in crushed cookies or nuts for extra texture.
Alternative Toppings and Garnishes
Toppings make your strawberry pops fun! Instead of just sprinkles, think about:
– Crushed graham crackers for a s’mores vibe
– Toasted coconut for a tropical twist
– Mini chocolate chips for extra chocolatey goodness
You can even drizzle some melted chocolate on top for a fancy look. The options are endless, so let your creativity shine!
Storage Info
How to Store Chocolate Covered Strawberry Pops
To keep your chocolate covered strawberry pops fresh, store them in an airtight container. Place parchment paper between each layer to prevent sticking. This helps maintain their shape and keeps them looking great.
Freezing vs. Refrigerating
Refrigerating is best for short-term storage. Your pops will stay fresh for about 2-3 days. If you want to keep them longer, freezing is a good option. Just note that freezing may change the texture of the strawberries. For freezing, wrap each pop in plastic wrap and place them in a freezer-safe bag. They can last up to 2 months in the freezer.
Shelf Life and Best Practices
The best time to enjoy your pops is within a few days. After that, they may lose their flavor and texture. Always check for any signs of spoilage before eating. If you see any moisture or changes in the chocolate coating, it’s best to toss them. For the best taste, consume them fresh!
FAQs
Can I use frozen strawberries for this recipe?
You can use frozen strawberries but they may not taste as good. Fresh strawberries have a better flavor and texture. Frozen berries often lose water when thawed. This water can make the chocolate slide off. If you use frozen strawberries, let them thaw first. Pat them dry to help the chocolate stick.
How do I make the chocolate coating smooth?
To make smooth chocolate, mix in coconut oil. It helps thin the chocolate. Melt the chocolate and oil together in the microwave. Heat in short bursts and stir often. This keeps the chocolate from burning. Stir until it is completely smooth before dipping the strawberries.
What are some ideas for themed chocolate-covered strawberries?
For a fun twist, try these ideas:
– Holiday Themes: Use red and green sprinkles for Christmas.
– Birthday Themes: Use colorful sprinkles or edible glitter.
– Seasonal Themes: Use pastel colors for spring or dark colors for fall.
You can also dip them in white chocolate for more color.
Where can I buy chocolate-covered strawberry pops?
You can find chocolate-covered strawberry pops at many dessert shops. Check local bakeries and candy stores. Some grocery stores also sell them. If you prefer, you can order them online. Many companies ship fresh treats right to your door.
This blog post covered how to make delicious chocolate-covered strawberry pops. You learned about the main ingredients and equipment needed. I guided you through each step, from preparing strawberries to decoration. We explored tips for choosing the best ingredients and avoiding common mistakes. You discovered fun ways to switch up flavors and toppings. Remember, storing your treats properly keeps them fresh longer. Enjoy making these tasty pops and impressing your friends and family with your skill