If you’re looking for a fun and spooky treat this Halloween, I’ve got just the thing: Halloween mini pizzas! These easy-to-make goodies let kids get creative while enjoying a tasty snack. With just a few simple ingredients, you can whip up these festive treats that will impress both kids and adults. Let’s dive into how to make these mini pizzas that are not only delicious but also a hit at any Halloween party!
Why I Love This Recipe
- Fun for Kids: This recipe is a great way to involve children in the kitchen, allowing them to create their own spooky designs.
- Customizable Toppings: With a variety of toppings available, you can cater to different tastes and preferences, making it a crowd-pleaser.
- Quick to Prepare: Ready in just 30 minutes, these mini pizzas are perfect for a last-minute Halloween gathering or party.
- Delightfully Festive: Themed pizzas bring a spooky flair to your Halloween festivities, making them a hit among guests of all ages.
Ingredients
List of Ingredients
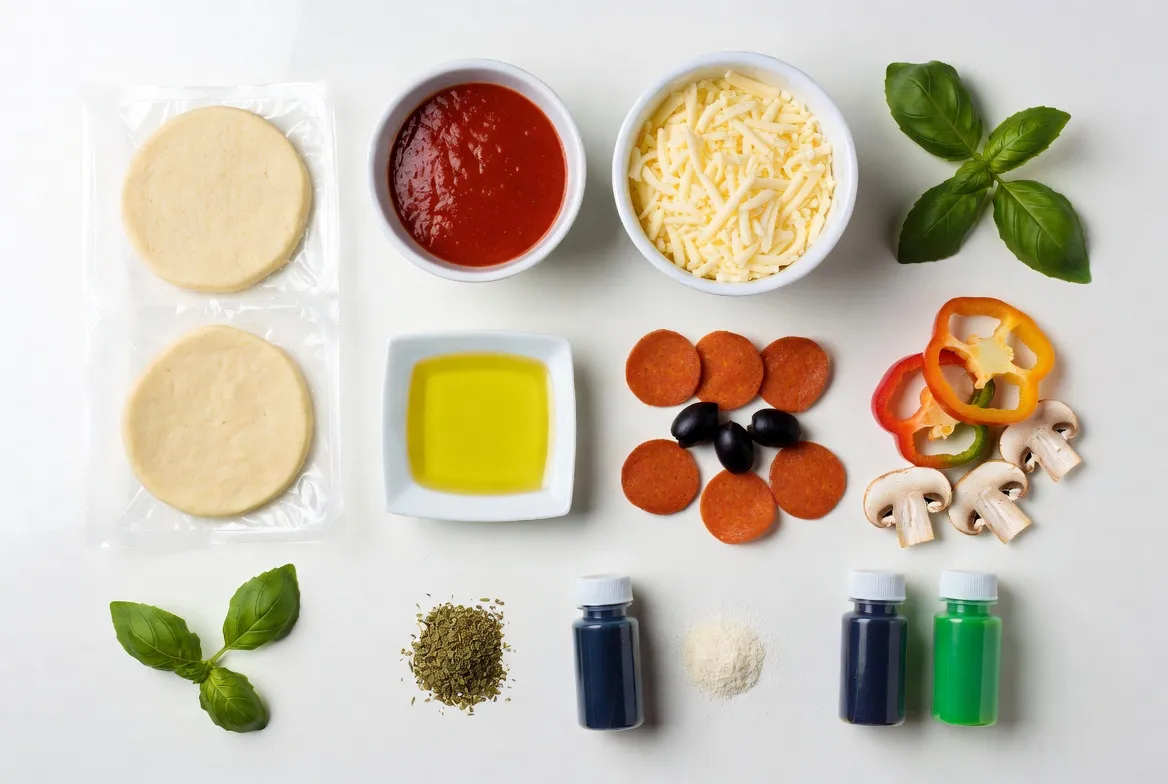
– Mini pizza dough or pre-made mini crusts
– Pizza sauce
– Shredded mozzarella cheese
– Assorted toppings (pepperoni, black olives, bell peppers, mushrooms, etc.)
– Olive oil
– Dried oregano
– Garlic powder
– Optional decorative ingredients (black and green food coloring, fresh basil leaves)
To make Halloween mini pizzas, gather these ingredients first. Mini pizza dough works well, but pre-made crusts save time. You’ll need pizza sauce and shredded mozzarella cheese for a classic base. Assorted toppings add fun shapes and spooky faces. Pepperoni, black olives, bell peppers, and mushrooms are great choices.
Olive oil gives the crust a nice shine, while dried oregano and garlic powder add flavor. You can use black and green food coloring for extra decoration. Fresh basil leaves can brighten up your spooky pizzas, making them look festive and tasty.
Having all these ingredients ready lets you create a fun cooking experience. Prepare your workspace and get ready to unleash your creativity!
Step-by-Step Instructions
Prepping the Oven and Dough
First, preheat your oven to 425°F (220°C). This is key for a crispy crust. If you’re using mini pizza dough, roll it out on a floured surface. Aim for about ¼-inch thickness. You can cut the dough into fun shapes with cookie cutters or just make small rounds. If you have pre-made crusts, you can skip this step.
Assembling the Pizzas
Next, arrange your crusts on a lined baking sheet. This helps keep them from sticking. Use a pastry brush or spoon to lightly coat each crust with olive oil. This gives them a nice golden color. Sprinkle garlic powder and dried oregano on top for extra flavor. Now, take a generous teaspoon of pizza sauce and spread it across each mini crust, leaving about a ½-inch border around the edges. Then, evenly distribute the shredded mozzarella cheese over the sauce. Make sure every pizza gets enough cheese!
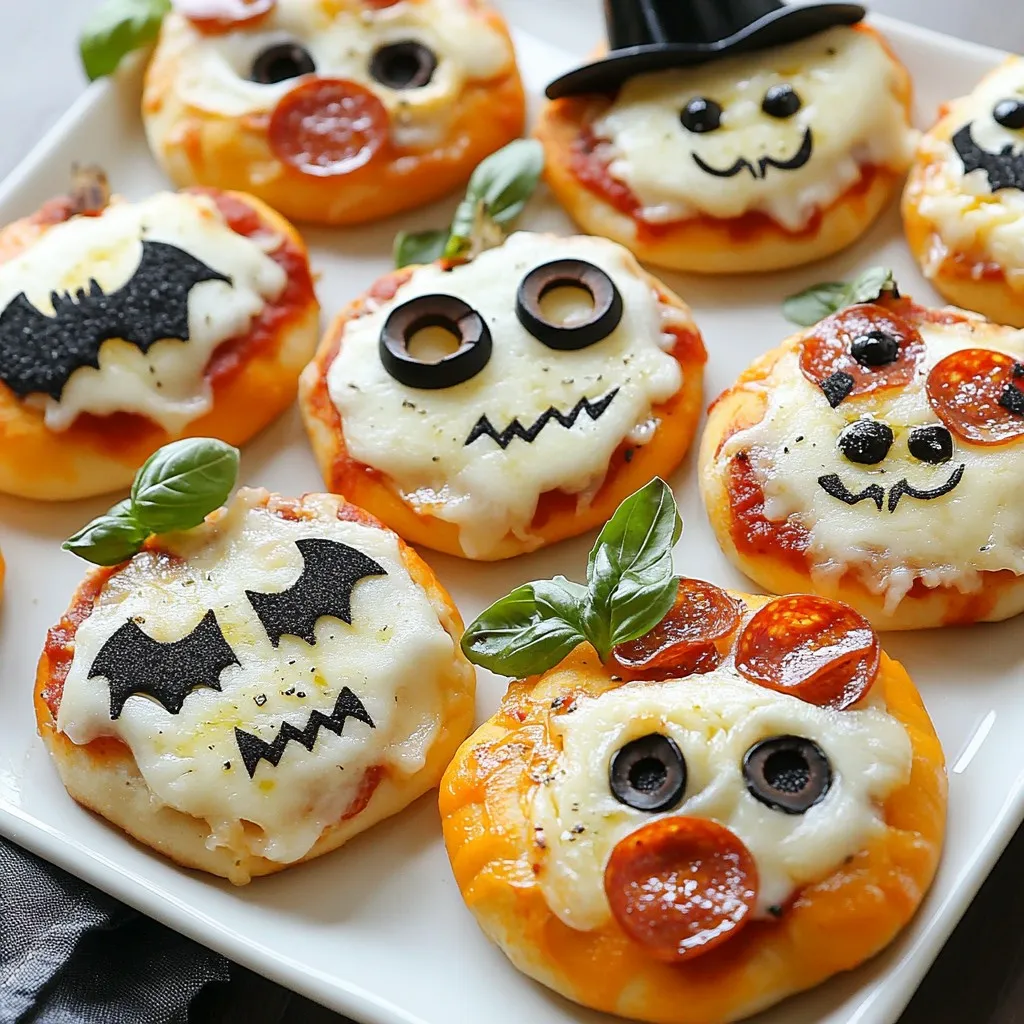
Creating Spooky Designs
Now comes the fun part! Use assorted toppings to create spooky shapes and faces on your mini pizzas. Black olives can be creepy eyes, while pepperoni can become witch hats. Use bell peppers to make ghost shapes. For added flair, mix a drop of black food coloring into some mozzarella cheese for a “witchy” topping. You can add green food coloring to the pizza sauce for a ghoulish look. Let your creativity shine!
Baking and Cooling
Bake your mini pizzas in the preheated oven for 10-12 minutes. Look for a golden brown crust and bubbly cheese. Once baked, take them out and let them cool for a few moments. This helps with safe eating and makes it easier to garnish. Finally, add fresh basil leaves on top for a pop of color and flavor before serving. Enjoy your spooky mini pizzas!
Tips & Tricks
Perfecting the Crust
To get that golden finish, brush each mini crust with olive oil. This adds flavor and helps the dough crisp up nicely. Use a pastry brush or a spoon to spread the oil evenly.
To keep your pizzas from sticking, line your baking sheet with parchment paper. This simple step makes clean-up easy and ensures your pizzas slide off without fuss. If you don’t have parchment, sprinkle a little flour on the sheet before placing the crusts down.
Enhancing Flavor
Want to add more flavor? Consider mixing in spices like Italian seasoning or red pepper flakes. Dried basil also works well! Just a pinch can elevate your mini pizzas.
When layering toppings, start with cheese and sauce. Avoid piling too many toppings, as this can make the crust soggy. Keep it balanced so every bite is tasty.
Presentation Ideas
For a fun Halloween touch, serve your mini pizzas on a themed platter. Use ghost or pumpkin-shaped dishes to enhance the spooky vibe. You can also sprinkle some fake spider webs around the platter for a creepy effect.
Don’t forget to garnish! Fresh basil leaves add color and a hint of flavor. Place them on top of the cheese right after baking for a fresh look that impresses your guests.
Pro Tips
- Use Fresh Ingredients: Fresh toppings not only enhance the flavor but also add vibrant colors to your spooky pizzas. Opt for seasonal vegetables for a Halloween twist!
- Experiment with Cheese: Mix different types of cheese, like cheddar or gouda, with mozzarella for a unique flavor profile that will surprise your guests.
- Personalize the Shapes: Use Halloween-themed cookie cutters to create fun and spooky shapes from the dough, making your mini pizzas even more festive and appealing to kids.
- Serve with Dipping Sauces: Enhance the experience by offering a selection of dipping sauces like ranch, marinara, or garlic butter for an extra layer of flavor.
Variations
Dietary Alternatives
For those with dietary needs, you can switch the crust. Use gluten-free pizza dough or buy pre-made gluten-free mini crusts. Many brands now offer tasty options. This way, everyone can join in on the fun.
If you want to make your mini pizzas vegan, use vegan cheese. There are many great brands available now. Try plant-based toppings like mushrooms, bell peppers, and spinach. These will keep the flavors fresh and exciting.
Flavor Combinations
Getting creative with toppings can make your pizzas stand out. Try unique pairings, like pineapple and jalapeños or barbecue sauce with chicken. These combos add a fun twist for adventurous eaters.
For a seasonal touch, add ingredients like butternut squash or pumpkin puree for a fall vibe. You can also use fresh herbs like rosemary or thyme. These additions will surprise your guests and make every bite special.
Kid-Friendly Ideas
You can simplify designs for younger kids. Use fewer toppings and let them help arrange them. This way, they feel proud of their creation.
Also, allow kids to pick their toppings. Set up a mini pizza bar with bowls of different options. This lets them express their creativity while making their very own spooky mini pizzas.
Storage Info
Storing Leftovers
To keep your Halloween mini pizzas fresh, follow these steps:
– Refrigerate promptly: Place leftovers in the fridge within two hours of baking.
– Use airtight containers: Store mini pizzas in a container with a tight seal. This keeps them from drying out.
– Separate layers: If stacking pizzas, place parchment paper between layers to avoid sticking.
Reheating Tips
Reheating mini pizzas properly ensures they stay tasty. Here’s how:
– For the best texture: Use the oven. Preheat it to 350°F (175°C). Bake for about 10 minutes. This keeps the crust crispy.
– Microwave option: If short on time, place a pizza on a microwave-safe plate. Heat for 30-45 seconds. The crust will be soft but still delicious.
– Avoid sogginess: Do not cover the pizza while microwaving. This keeps moisture from making the crust soggy.
FAQs
How can I make my mini pizzas healthier?
To make your mini pizzas healthier, choose low-calorie toppings. Here are some ideas:
– Use turkey pepperoni or chicken slices instead of regular pepperoni.
– Add more veggies like spinach, zucchini, or broccoli.
– Swap mozzarella for part-skim cheese or use less cheese overall.
– Consider whole wheat or cauliflower crusts for added fiber.
– Use homemade pizza sauce to control sugar and salt levels.
Can I prepare the toppings in advance?
Yes, you can prep toppings ahead of time. Here are some tips:
– Chop vegetables and store them in airtight containers.
– Pre-slice meats and keep them chilled until ready to use.
– Mix your pizza sauce and store it in the fridge.
– This way, you can quickly assemble your mini pizzas when you’re ready.
What’s the best way to freeze mini pizzas?
Freezing mini pizzas is easy. Follow these steps:
– Assemble the pizzas but do not bake them.
– Place them on a baking sheet and freeze for about 1 hour.
– Once frozen, transfer them to a freezer-safe bag or container.
– To thaw, place them in the fridge overnight.
– Bake as directed, adding a minute or two if needed.
Are there any allergy-friendly options?
Yes, there are many allergy-friendly options. Here are common allergens to avoid:
– Gluten: Use gluten-free crusts made from almond or rice flour.
– Dairy: Try vegan cheese or nutritional yeast as a cheesy flavor.
– Nuts: Be cautious with toppings like pesto that may contain nuts.
– Soy: Check for soy in pre-made sauces and toppings.
– Always read labels to ensure safety for kids with allergies.
Making mini Halloween pizzas is simple and fun. You can choose your dough, sauce, and toppings. Follow the steps for a spooky design that impresses everyone. Keep the tips in mind to enhance flavor and presentation. Explore dietary alternatives and creative combos to please all tastes. Store leftovers smartly and reheat for the best results. Enjoy making these mini treats with friends and family. They are perfect for Halloween gathering