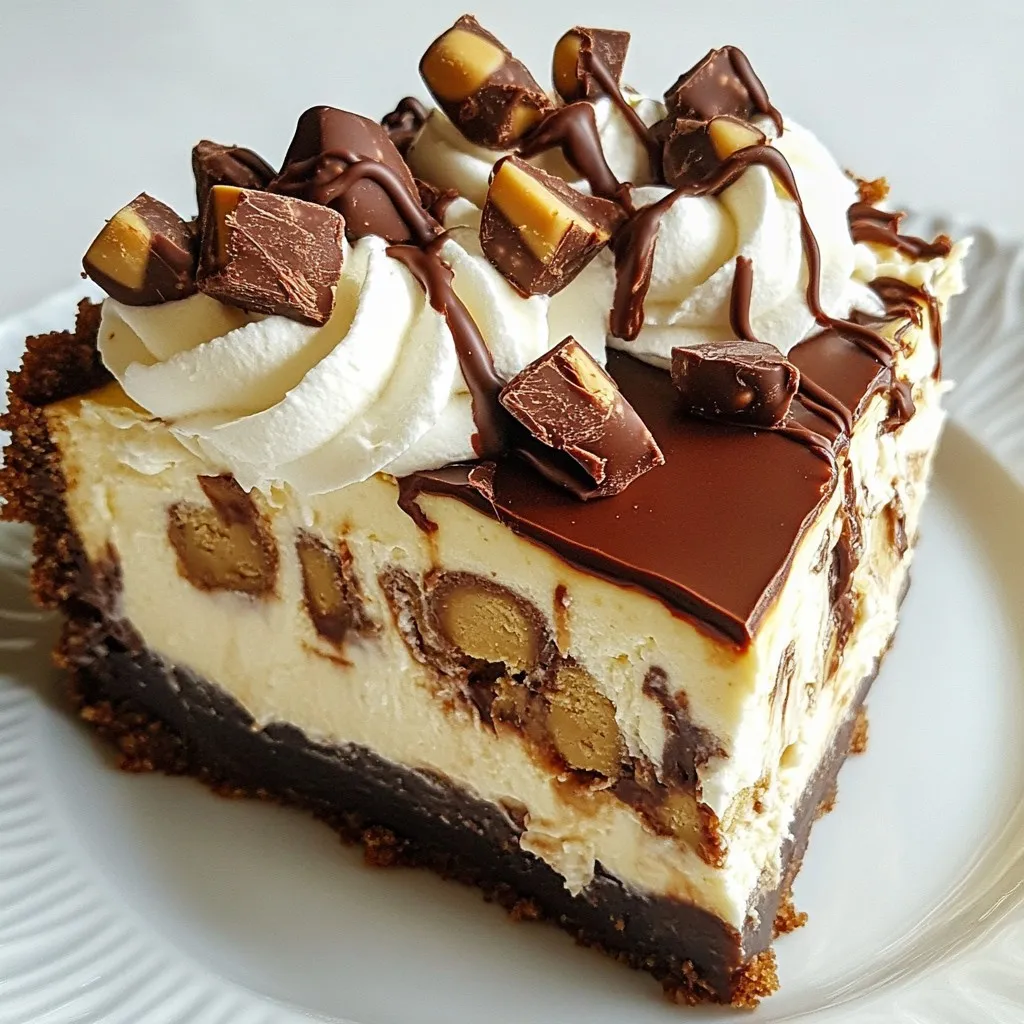
If you love peanut butter and cheesecake, you’re in for a treat! My Peanut Butter Cup Cheesecake is a rich and creamy delight that will satisfy all your cravings. This dessert features a smooth filling made with real peanut butter and cream cheese, all on a buttery graham cracker crust. Ready to impress your friends and family? Let’s dive into the ingredients, instructions, and tips to make this heavenly cheesecake together!
Why I Love This Recipe
- Decadent Flavor Combination: This cheesecake perfectly blends the rich, creamy taste of peanut butter with the smoothness of cream cheese and the sweetness of chocolate, making each bite irresistible.
- Easy to Make: With simple ingredients and straightforward steps, this recipe is accessible even for novice bakers. Just mix, pour, and chill!
- Impressive Presentation: Once set, the cheesecake looks stunning, especially when garnished with whipped cream and Reese’s cups, making it perfect for gatherings.
- Perfect for Any Occasion: This dessert is versatile enough to be served at parties, holidays, or even as a special treat for yourself—you’ll always want to share it!
Ingredients
Detailed List of Ingredients
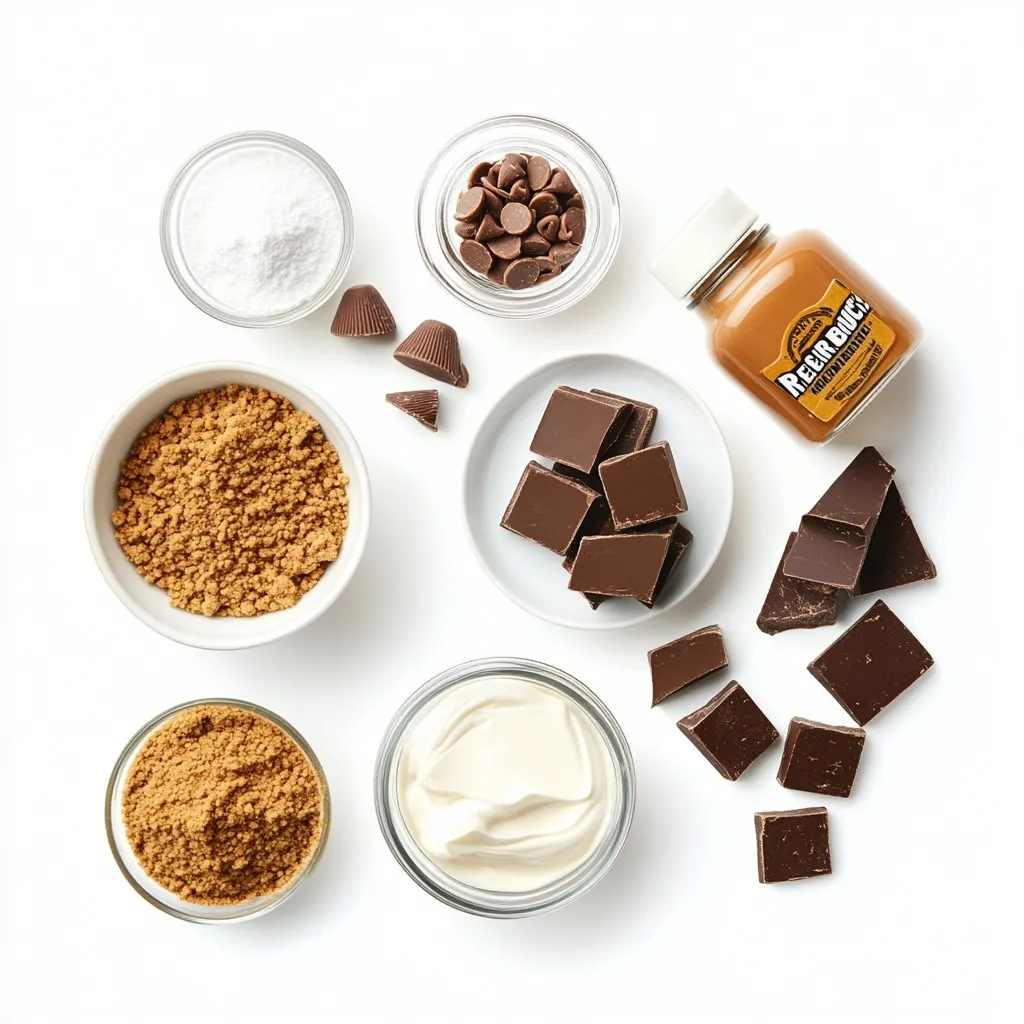
– 1 ½ cups graham cracker crumbs
– ½ cup unsalted butter, melted
– 2 cups cream cheese, softened
– 1 cup creamy peanut butter
– 1 cup powdered sugar
– 1 teaspoon vanilla extract
– 1 cup heavy cream
– ½ cup semi-sweet chocolate chips, melted
– 4 Reese’s Peanut Butter Cups, chopped (plus extra for garnishing)
To make the perfect Peanut Butter Cup Cheesecake, you need specific ingredients. Each one plays a key role in the taste and texture. The graham cracker crumbs create a delicious crust. The melted butter helps bind the crumbs together. Cream cheese gives the cheesecake its rich and creamy base. Creamy peanut butter infuses that wonderful flavor we all love.
Powdered sugar sweetens the mix and makes it smooth. Vanilla extract adds a hint of warmth. Heavy cream is essential for a light, airy texture. Melted semi-sweet chocolate enhances the chocolatey goodness. Finally, Reese’s Peanut Butter Cups add that extra crunch and flavor.
Ingredient Substitutions
– For cream cheese, you can use ricotta or a vegan option like cashew cream.
– Instead of powdered sugar, try coconut sugar or stevia for a healthier choice.
– For a dairy-free option, use coconut cream for the whipped topping.
If you need to switch out ingredients, it’s easy! Use ricotta for cream cheese if you want a lighter option. Coconut sugar or stevia can give you a sweet taste without the calories. And if you’re dairy-free, coconut cream works well for whipped cream. These swaps keep the cheesecake tasty while meeting your needs.
Step-by-Step Instructions
Preparing the Crust
Start by mixing the graham cracker crumbs and melted butter in a bowl. Stir until each crumb is coated. This mixture should feel like wet sand. Next, press this mixture into the bottom of a 9-inch springform pan. Use your fingers to make it even and firm. This crust will hold your cheesecake together. After pressing, put the pan in the fridge while you make the filling.
Making the Creamy Filling
In a large bowl, beat the softened cream cheese and creamy peanut butter with an electric mixer. Mix until it becomes smooth and velvety. This step is key for a rich taste. Gradually add the powdered sugar and vanilla extract. Keep mixing until there are no lumps. The filling should feel light and creamy.
Whipping the Cream
Take a clean bowl and whip the heavy cream until stiff peaks form. This means it should hold its shape. Stiff peaks make the cheesecake airy and fluffy. Carefully fold the whipped cream into the peanut butter mixture. Use a spatula and be gentle. You want to keep that fluffiness.
Adding Chocolate and Reese’s
Now, fold the melted semi-sweet chocolate into your creamy filling. Mix gently to combine. Next, add the chopped Reese’s Peanut Butter Cups. This adds a nice crunch and extra flavor. Make sure they are evenly mixed in so every bite is delicious.
Assembling the Cheesecake
Pour the creamy filling over the chilled graham cracker crust. Use a spatula to smooth the top evenly. This helps it look nice when served. Make sure the filling sits well on the crust.
Chilling the Cheesecake
Cover the cheesecake with plastic wrap or foil. Place it in the refrigerator for at least 4 hours. If you can, chill it overnight. This time helps the cheesecake set properly and taste better. A good chill will give you a perfect texture and flavor.
Tips & Tricks
Common Mistakes to Avoid
– Overmixing the filling: Mix just until smooth. Overmixing can add air and make your cheesecake too fluffy, rather than creamy.
– Not chilling long enough: Patience is key! Chill the cheesecake for at least 4 hours, but overnight is best. This helps it set properly.
Presentation Tips
– Serving suggestions for an elegant look: Serve each slice on a nice plate. Add a drizzle of chocolate sauce for a fancy touch.
– Drizzling chocolate sauce and using garnishes: Top with whipped cream and chopped Reese’s Cups. It adds color and texture, making your dessert pop!
Equipment Recommendations
– Best springform pan sizes: A 9-inch springform pan works great for this recipe. It gives enough space for the cheesecake to rise.
– Tips for using electric mixers: Use a hand mixer or stand mixer. Make sure your cream cheese is soft for easy mixing. This ensures a smooth filling without lumps.
Pro Tips
- Chill Your Ingredients: Ensure your cream cheese is at room temperature for easier mixing, and chill the heavy cream for better whipping results.
- Use Quality Chocolate: Opt for high-quality semi-sweet chocolate for melting; this will enhance the flavor of your cheesecake significantly.
- Don’t Rush the Chilling: Allow the cheesecake to chill overnight for the best texture and flavor development; patience is key!
- Garnish Creatively: Besides Reese’s, consider drizzling with caramel sauce or adding crushed nuts for an extra layer of flavor and texture.
Variations
Flavor Additions
You can make your cheesecake even tastier by adding different flavors. Try using milk chocolate or dark chocolate instead of semi-sweet. Each kind brings its own sweet touch. You can also toss in chopped nuts, like peanuts or pecans. Adding candies, like M&M’s or Snickers, gives a fun twist.
Alternative Crust Ideas
Want to switch up the crust? Use Oreo crumbs for a rich chocolate base. You can also try a nut crust made from ground almonds or walnuts. For those who need gluten-free options, use gluten-free graham crackers. This way, everyone can enjoy a slice.
Serving Variations
When serving your cheesecake, think about tasty toppings. A drizzle of caramel sauce makes it extra sweet. Fresh fruits like strawberries or bananas can add a fresh burst of flavor. You can also present each slice on a plate with a dollop of whipped cream. For a party, add extra crushed graham crackers around the plate for a nice touch.
Storage Info
Best Storage Practices
Store your leftover cheesecake in an airtight container. This keeps it fresh for longer. Place a piece of parchment paper between the cheesecake and the lid to avoid sticking. Always let the cheesecake cool completely before storing. If it’s still warm, condensation can form and ruin the texture.
Freezing Instructions
You can freeze this cheesecake without losing its creamy texture. First, wrap the cheesecake tightly in plastic wrap. Then, place it in a freezer-safe bag or container. This helps protect it from freezer burn. When you are ready to enjoy, move it to the fridge for a few hours to thaw. Serve it chilled for the best taste.
Shelf Life
This cheesecake lasts up to five days in the fridge. Keep it covered to maintain freshness. Always check for spoilage signs. If you see any mold or the smell changes, it’s best to discard it. Enjoy your Peanut Butter Cup Cheesecake while it’s fresh!
FAQs
How do I know when my cheesecake is set?
To check if your cheesecake is set, look for firmness. Gently press on the center. If it feels slightly firm and doesn’t jiggle much, it’s good to go. The texture should be smooth and creamy. It’s okay if the edges are a bit firmer than the center. This makes for a perfect slice!
Can I make this cheesecake ahead of time?
Yes, you can make this cheesecake a day before serving. This way, it has enough time to chill. After assembling, cover it with plastic wrap. Place it in the fridge for at least 4 hours or overnight. The flavors will blend, making it even tastier!
What can I use instead of Reese’s Peanut Butter Cups?
If you don’t have Reese’s, try other candies. You could use crushed Twix bars for a crunchy twist or chopped Snickers for a caramel flavor. For a healthier option, use chopped dark chocolate or chocolate chips. Each will add its special touch to the cheesecake.
Is this cheesecake suitable for dietary restrictions?
To make this cheesecake gluten-free, use gluten-free graham cracker crumbs. For a dairy-free option, use vegan cream cheese and coconut cream. You can also lower the sugar by using a sugar substitute like stevia. These swaps let more people enjoy this delicious treat!
This blog post covered how to make a delicious no-bake peanut butter cheesecake. We discussed the important ingredients and some easy substitutions. You learned step-by-step instructions for making the crust and creamy filling. I shared tips to avoid common mistakes and helped you with serving ideas.
In conclusion, this cheesecake is perfect for sweet lovers. Follow the steps carefully, and you’ll create a treat everyone enjoys. Don’t hesitate to get creative with flavors and toppings. Happy bakin