There’s nothing like the joy of baking festive cookies, especially Peppermint Chocolate Thumbprints! These treats blend creamy chocolate with a refreshing peppermint twist, making them perfect for the holiday season. In this article, I’ll guide you through every step, from selecting quality ingredients to tips for perfecting your cookie texture. Get ready to impress your friends and family with these delightful bites that are sure to become a seasonal favorite!
Why I Love This Recipe
- Delicious Flavor Combination: The blend of rich chocolate and refreshing peppermint creates a perfect balance that is delightful in every bite.
- Festive Presentation: The vibrant crushed peppermint on top not only looks stunning but also adds a cheerful touch to any holiday gathering.
- Easy to Make: This recipe is straightforward and doesn’t require any special techniques, making it great for bakers of all levels.
- Perfect for Sharing: With about 24 cookies, these treats are perfect for holiday parties or gift-giving, spreading joy to family and friends.
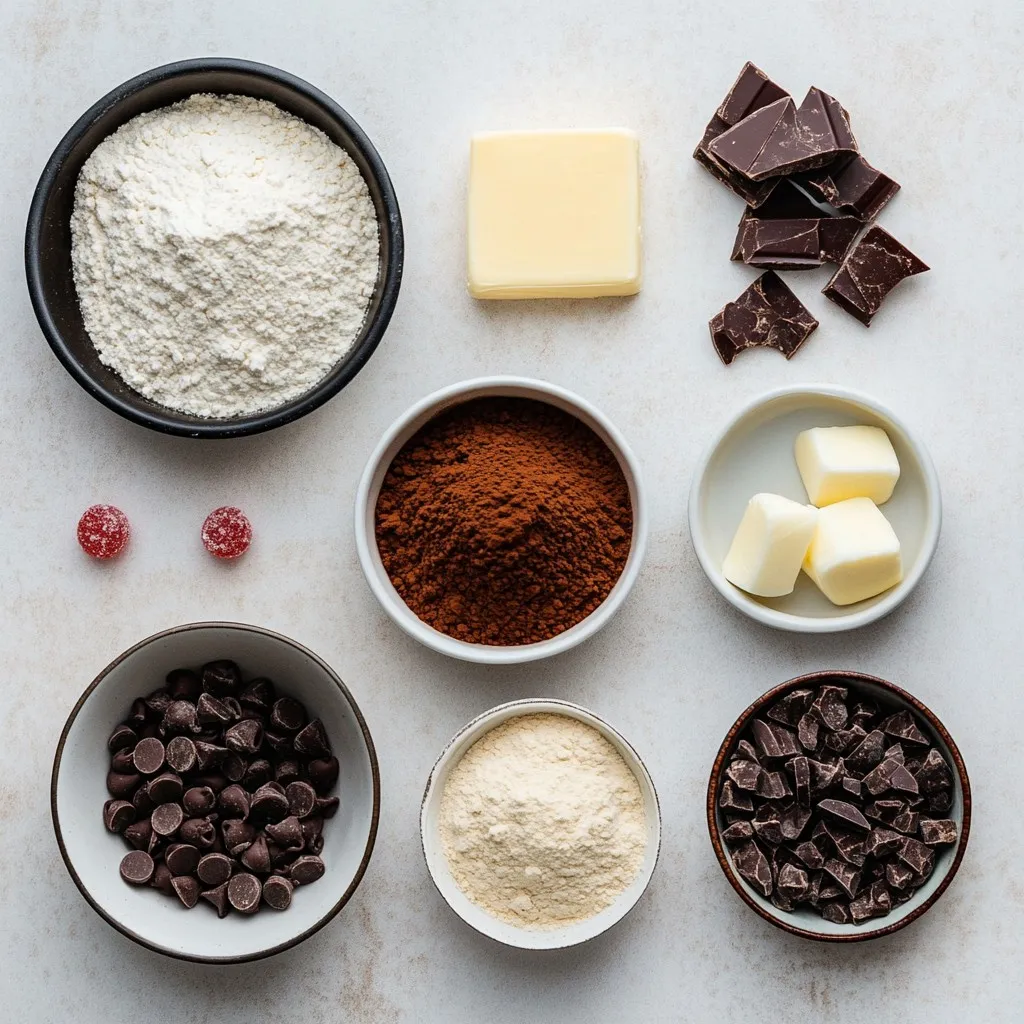
Ingredients
Complete List of Ingredients
– 1 cup all-purpose flour
– 1/2 cup unsweetened cocoa powder
– 1/2 teaspoon baking powder
– 1/4 teaspoon salt
– 1/2 cup unsalted butter, softened to room temperature
– 1/2 cup granulated sugar
– 1 large egg
– 1 teaspoon vanilla extract
– 1 teaspoon peppermint extract
– 1/2 cup semi-sweet chocolate chips (for the filling)
– Crushed peppermint candies for garnish
The ingredients for peppermint chocolate thumbprints are simple yet essential. Each one enhances the flavor and texture of the cookie. The cocoa powder gives a rich chocolate taste, while peppermint extract provides that refreshing kick.
Suggested Brands for Quality Ingredients
– Flour: King Arthur Flour is a reliable choice.
– Cocoa Powder: Ghirardelli offers a rich flavor.
– Butter: I recommend Kerrygold for its creamy texture.
– Chocolate Chips: Guittard semi-sweet chips melt beautifully.
– Peppermint Candies: Use Starlight Mints for vibrant color and taste.
Using quality ingredients makes a big difference. Brands like these ensure great taste and texture in your cookies.
Ingredient Substitutions
– All-Purpose Flour: You can use gluten-free flour for a gluten-free version.
– Unsweetened Cocoa Powder: Carob powder can work as a caffeine-free option.
– Unsalted Butter: Coconut oil is a good dairy-free substitute.
– Granulated Sugar: You can use coconut sugar for a healthier option.
– Semi-Sweet Chocolate Chips: Dark chocolate chips are a tasty alternative.
These substitutions can help you customize the recipe to fit your needs. Don’t hesitate to experiment and find what works best for you!
Step-by-Step Instructions
Prepping the Oven and Baking Sheet
First, preheat your oven to 350°F (175°C). This step is key for even baking. While the oven warms up, take a baking sheet and line it with parchment paper. This paper helps the cookies release easily after baking.
Mixing Dry and Wet Ingredients
In a medium bowl, whisk together the dry ingredients. Use 1 cup of all-purpose flour, 1/2 cup of unsweetened cocoa powder, 1/2 teaspoon of baking powder, and 1/4 teaspoon of salt. Make sure they blend well. This mix is your base. In a larger bowl, cream together 1/2 cup of softened unsalted butter and 1/2 cup of granulated sugar. Beat it for about 3 minutes. It should look light and fluffy. Next, mix in 1 large egg, 1 teaspoon of vanilla extract, and 1 teaspoon of peppermint extract. Beat until everything is smooth.
Forming the Cookies and Creating Indentations
Now, gently add the dry mix to the wet batter. Stir until just combined. The dough should feel soft but not sticky. Scoop out tablespoon-sized portions and roll them into balls. Place them on the baking sheet with about 2 inches between each ball. Use your thumb or the back of a teaspoon to press down in the center of each ball. This creates a small well for the chocolate.
Baking Process and Filling with Chocolate
Put the baking sheet in the oven and bake for about 10-12 minutes. The cookie edges should be set, and the tops should look firm. After baking, let them cool on the sheet for a few minutes. If the indentations puffed up, gently press them down again. Add a few chocolate chips into each well. Return the cookies to the oven for another 2-3 minutes. This melts the chocolate nicely. Once out, sprinkle crushed peppermint candies over the melted chocolate. Let the cookies cool completely on a wire rack for the best results.
Tips & Tricks
How to Achieve the Perfect Cookie Texture
To get the best cookie texture, use room-temperature butter. This makes the dough smooth. Cream the butter and sugar well. You want it light and fluffy. This step helps create air pockets. The result? A soft, chewy cookie. Don’t overmix the dough after adding dry ingredients. Mix just until combined for the best texture.
Best Practices for Melting Chocolate
Melting chocolate can be tricky. Use a microwave or a double boiler. If using a microwave, heat in short bursts. Stir every 30 seconds to avoid burning. Chocolate should feel smooth and glossy when melted. If it looks thick or clumpy, it might be burnt. Keep an eye on it and use low heat to maintain that perfect texture.
Decoration Ideas for Festive Appeal
Make your cookies pop with fun decorations! After the chocolate melts, sprinkle crushed peppermint candies on top. They add color and crunch. You can also drizzle white chocolate for extra flair. Use a fork to create a fun design. For a holiday touch, serve cookies on a festive plate or add mint leaves. These small details make your treats shine!
Pro Tips
- Chill the Dough: If the dough feels too soft to handle, refrigerate it for 15-30 minutes. This will make rolling easier and help the cookies hold their shape during baking.
- Use Quality Chocolate: For the filling, opt for high-quality semi-sweet chocolate chips. The richer the chocolate, the better the overall flavor of your thumbprints.
- Experiment with Extracts: Try using different extracts such as almond or orange for a unique twist on the traditional peppermint flavor. Just be careful not to overpower the other ingredients.
- Store Properly: Keep your cookies in an airtight container at room temperature for up to a week. You can also freeze them for longer shelf life, just make sure to separate layers with parchment paper.
Variations
Alternative Flavor Extracts
While peppermint is a classic choice, you can play with different extracts. Try using almond or orange extract for a new twist. A hint of almond adds a nutty flavor. Orange gives a fresh, zesty touch. You can mix and match to find your favorite! Just keep the same amount as the peppermint extract in the recipe.
Using Different Chocolate Types
The chocolate you choose makes a big difference. Semi-sweet chocolate is the usual pick, but dark chocolate adds richness. Milk chocolate gives a sweeter taste, perfect for those with a sweet tooth. You can even try white chocolate for a fun contrast. Just melt your chosen chocolate and fill the cookies as directed.
Options for Dietary Restrictions (Gluten-Free, Vegan)
Making these cookies gluten-free is easy! Swap all-purpose flour with a gluten-free blend. Check that the blend has xanthan gum for the right texture. For a vegan version, replace butter with coconut oil and use a flax egg instead of a real egg. The flavor will still shine through, and the cookies will be just as delightful!
Storage Info
How to Properly Store Peppermint Chocolate Thumbprints
To keep your peppermint chocolate thumbprints fresh, place them in an airtight container. Layer the cookies with parchment paper to prevent sticking. Store them at room temperature for up to a week. For longer freshness, place them in the fridge. Just remember to bring them back to room temp before serving.
Freezing Instructions for Longer Shelf Life
You can freeze these cookies to enjoy later! First, let them cool completely. Then, place the cookies in a single layer on a baking sheet. Freeze for about an hour. Once firm, transfer them to a freezer-safe bag. They can last up to three months in the freezer. When you’re ready, just thaw them at room temperature.
Best Practices for Reheating
If you want to enjoy warm cookies, reheating is simple. Preheat your oven to 300°F (150°C). Place the cookies on a baking sheet and heat for about 5-7 minutes. This warms them without drying them out. For a tasty treat, you can also microwave a cookie for 10-15 seconds. Enjoy that melty chocolate!
FAQs
Can I make these cookies in advance?
Yes, you can make these cookies in advance. Prepare the dough and shape it into balls. Place the dough balls in an airtight container and refrigerate for up to three days. When you’re ready to bake, simply take them out and follow the baking steps. This keeps the flavors fresh and saves you time.
What can I use if I don’t have peppermint extract?
If you don’t have peppermint extract, use vanilla extract instead. It won’t give the same minty taste, but it adds a nice flavor. You can also use almond extract for a different twist. Just keep the amount similar to what the recipe calls for.
How long do these cookies stay fresh?
These cookies stay fresh for about five days. Store them in an airtight container at room temperature. If you want them to last longer, you can freeze them. Just make sure to wrap them well to avoid freezer burn.
Can I use milk chocolate instead of semi-sweet for the filling?
Yes, you can use milk chocolate instead of semi-sweet. Milk chocolate will make the cookies sweeter and creamier. Just remember to adjust the amount of sugar in the dough if you prefer a less sweet cookie.
You learned about peppermint chocolate thumbprint cookies. We discussed all the ingredients and brands for quality. You now know how to bake these cookies step by step. I shared tips to help you get the best texture and melt chocolate smoothly. We also covered variations for different diets and how to store leftovers.
With these tools, you can make delicious cookies that everyone will love. Enjoy your baking adventur