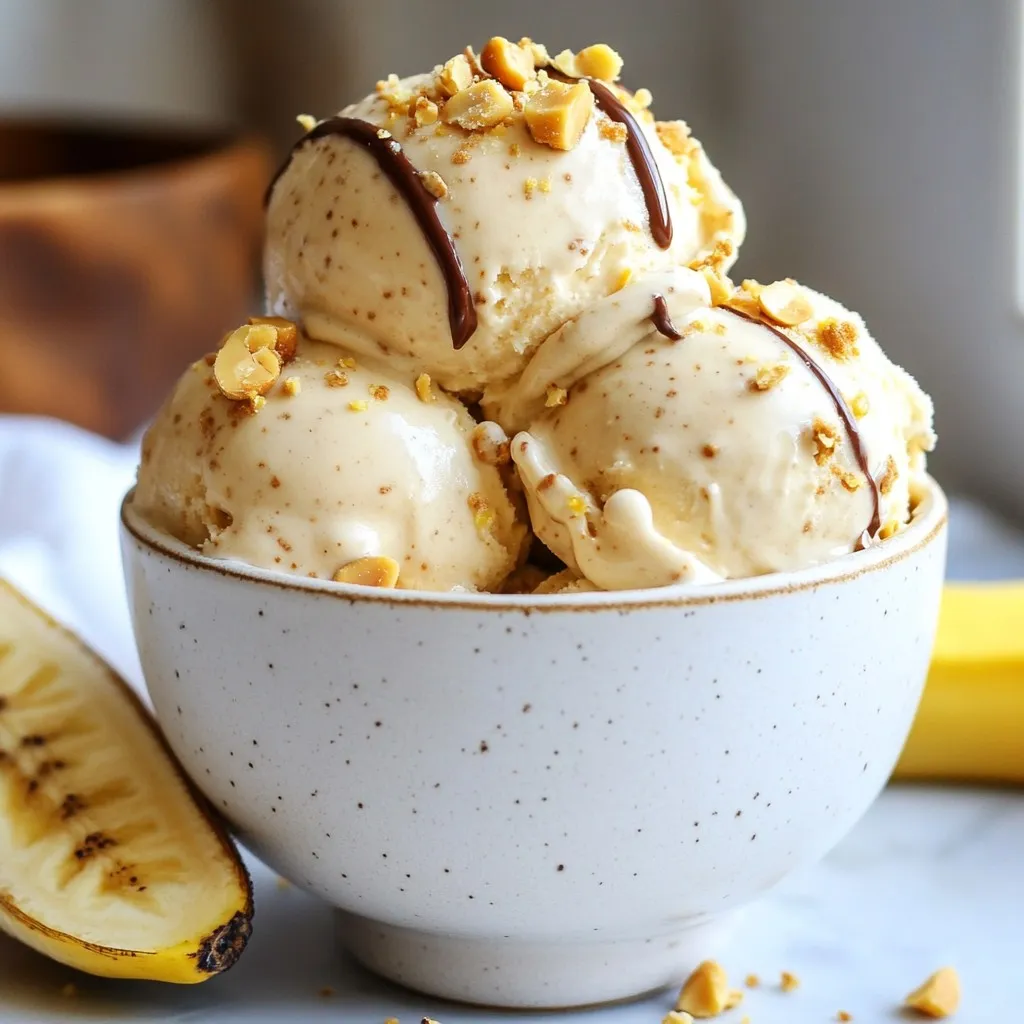
Craving a sweet treat that’s both easy and delicious? You need to try my Vegan Peanut Butter Banana Ice Cream. This simple delight uses ripe bananas and creamy peanut butter for a rich, smooth dessert. It’s healthy and perfect for hot days. With just a few steps, you’ll have a tasty scoop in no time. Let’s dive into the ingredients and get you started on this delightful recipe!
Why I Love This Recipe
- Healthier Indulgence: This creamy ice cream is made from wholesome ingredients, making it a guilt-free dessert option that satisfies your sweet tooth.
- Simple and Quick: With just a few easy steps and minimal prep time, you can whip up this delicious treat without any hassle.
- Customizable Flavors: The recipe allows for personal adjustments, such as adding more maple syrup or incorporating your favorite mix-ins for a unique twist.
- Kid-Friendly Fun: This ice cream is a great way to get kids involved in the kitchen, making it a fun family activity that everyone can enjoy together!
Ingredients
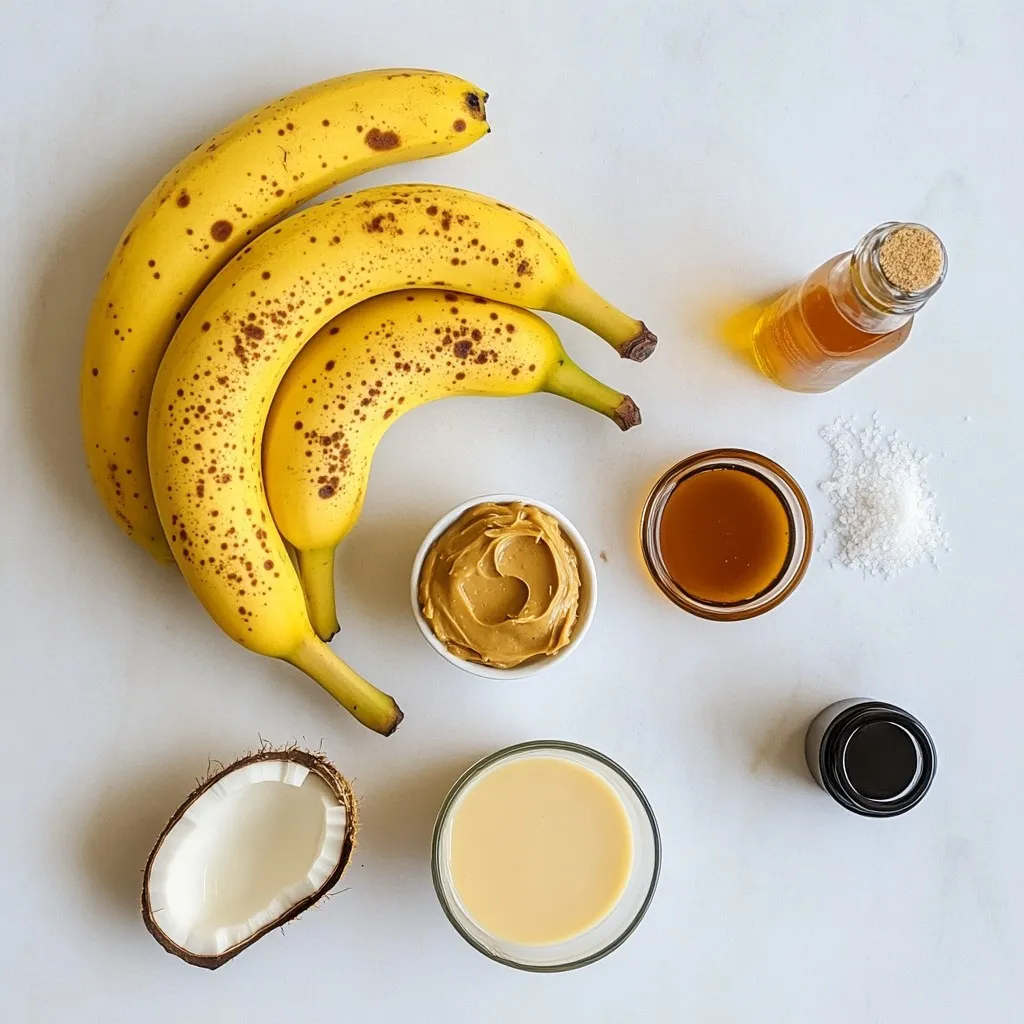
Main Ingredients for Vegan Peanut Butter Banana Ice Cream
To make this creamy treat, gather these main ingredients:
– 4 ripe bananas
– 1/2 cup creamy peanut butter
– 1/2 cup full-fat coconut milk
– 1 teaspoon vanilla extract
– Pinch of salt
These items form the base of our ice cream. The ripe bananas provide natural sweetness and creaminess. The peanut butter adds rich flavor and protein. Full-fat coconut milk gives a smooth texture, while vanilla and salt enhance the taste.
Optional Ingredients for Enhanced Flavor
You can add a few optional ingredients for extra flavor:
– 2 tablespoons maple syrup (for added sweetness)
– Crushed peanuts (for topping)
– Chocolate drizzle (for indulgence)
– Cinnamon (for a warm touch)
These extras let you customize your ice cream. You can adjust the sweetness with maple syrup. Toppings like crushed peanuts or chocolate make it even more fun!
Nutritional Benefits of Each Ingredient
Each ingredient brings unique benefits:
– Bananas: Rich in potassium and vitamins, they aid digestion.
– Peanut Butter: Packed with protein and healthy fats, it helps keep you full.
– Coconut Milk: Offers healthy fats and adds creaminess.
– Maple Syrup: Natural sweetener with some antioxidants.
– Vanilla Extract: May have calming effects and adds flavor.
This ice cream not only tastes good but also nourishes you. Each bite is a mix of fun and health!
Step-by-Step Instructions
Preparing the Bananas for Freezing
To start, peel the ripe bananas. You want them to be very ripe for the best flavor. Slice the bananas into small, even rounds. This helps them freeze quickly and evenly. Next, spread the banana slices in a single layer on a baking sheet. Make sure they are not touching each other. Place the baking sheet in the freezer. Let the banana slices freeze for at least 2 hours. They should be completely solid before you move on.
Blending the Ingredients to Perfection
Once your banana slices are frozen, take them out of the freezer. Transfer the slices to a food processor. Add in the creamy peanut butter and full-fat coconut milk. This will give your ice cream a rich texture. If you like it sweeter, include the maple syrup too. Don’t forget the vanilla extract and a pinch of salt. Blend everything on high speed. Stop a few times to scrape down the sides. This ensures all the ingredients mix well. Keep blending until you reach a smooth and creamy consistency.
Adjusting Sweetness and Consistency
After blending, taste your mixture. If you want more sweetness, add a bit more maple syrup. Blend again briefly to mix in the extra sweetness. If you prefer a soft-serve texture, serve it now! If you want a firmer ice cream, transfer the mixture to an airtight container. Freeze it for about 1-2 more hours. When you’re ready to serve, let it sit for about 5 minutes at room temperature. This makes scooping easier and more fun!
Tips & Tricks
Ideal Bananas for Creaminess
Choose ripe bananas for the best taste and texture. Look for bananas with brown spots. These spots mean the bananas are sweet and soft. This softness helps create a creamy ice cream. If the bananas are too green, they won’t blend well. Avoid using overripe bananas as they can taste too strong.
Best Practices for Blending
When you blend, start on low speed. This helps break down the frozen bananas. Gradually increase the speed to high. Stop and scrape the sides of the bowl often. This step ensures all ingredients mix well. Blend until the mixture is smooth and creamy. Don’t rush; it might take a few minutes. If your blender struggles, add a little coconut milk to help.
Tips for Serving & Storing the Ice Cream
For the best taste, serve right after blending. This gives you a soft-serve style. If you prefer it firmer, freeze it for 1-2 hours. When ready to serve, let it sit at room temperature for 5 minutes. This makes scooping easier. Store leftovers in an airtight container. To keep it fresh, press plastic wrap directly on the surface before sealing. Enjoy within a week for the best flavor!
Pro Tips
- Use Very Ripe Bananas: The riper the bananas, the sweeter and creamier the ice cream will be. Look for bananas with plenty of brown spots for the best flavor.
- Chill Your Ingredients: For an extra creamy texture, chill the peanut butter and coconut milk in the fridge before blending. This helps them incorporate more smoothly with the frozen bananas.
- Experiment with Sweetness: Adjust the amount of maple syrup based on your personal taste. Remember that freezing can dull sweetness, so taste the mixture before freezing!
- Storage Tips: Store any leftover ice cream in an airtight container. To prevent ice crystals, press a piece of parchment paper directly onto the surface before sealing.
Variations
Adding Toppings for Extra Flavor
Toppings can make your ice cream even better. You can try crushed peanuts, which add a nice crunch. Dark chocolate chips bring a rich taste. A drizzle of maple syrup gives a sweet touch. You can also sprinkle cinnamon for a warm flavor. Fresh fruit slices like strawberries or raspberries brighten up the dish. Get creative with your toppings and make your ice cream unique!
Substituting Sweeteners
If you want to change the sweet flavor, there are many options. You can swap maple syrup for agave nectar. Honey works too, but it’s not vegan. For a low-calorie option, use stevia or erythritol. If you prefer a fruity taste, try adding pureed dates. Adjust the sweetness to what you like best. Remember, small changes can lead to big flavor!
Dairy-Free Mix-Ins and Extras
Mix-ins can make your ice cream more fun. Try adding dairy-free chocolate chunks for a sweet treat. Shredded coconut adds texture and a tropical vibe. You can also mix in some chia seeds for extra fiber. For a nutty twist, add almond slices or sunflower seeds. These extras can change the taste and make your ice cream special. Experiment with what you love!
Storage Info
How to Store Leftover Ice Cream
To store leftover ice cream, use an airtight container. This helps keep the ice cream fresh. Make sure to press a piece of plastic wrap against the surface before sealing the lid. This extra layer helps prevent ice crystals from forming.
Tips for Maintaining Texture
To maintain a creamy texture, avoid leaving the ice cream in the freezer for too long. If it hardens, let it sit at room temperature for a few minutes before scooping. Stirring the ice cream every 30 minutes while it freezes can also help keep it smooth and creamy.
Duration of Freezing and Best Practices
You can keep this ice cream for about two weeks in the freezer. However, for the best taste, enjoy it within a week. If you notice any ice crystals forming, it’s a sign that it’s time to eat up! Always store it in a cold part of the freezer, away from the door. This helps maintain a consistent temperature.
FAQs
Can I use other nut butters?
Yes, you can use other nut butters. Almond butter or cashew butter works well too. Just make sure the nut butter is smooth and creamy. This keeps the ice cream soft and rich. Each nut butter adds its own flavor. Almond butter gives a nutty taste, while cashew butter adds a mild sweetness.
Is this recipe suitable for kids?
Absolutely! This recipe is perfect for kids. It uses natural ingredients like bananas and peanut butter. Kids love the sweet, creamy texture. Plus, it has no added dairy. You can even let them help with the mixing. It’s a fun way to get them involved in the kitchen!
How do I make it without a food processor?
If you don’t have a food processor, don’t worry! You can use a blender instead. Just make sure to cut the frozen bananas into smaller pieces. This helps the blender work better. Blend in batches if needed. You can also use a potato masher for a chunky texture. It may take more time, but you’ll still enjoy a tasty treat!
This blog post shares how to create delicious vegan peanut butter banana ice cream. We explored key ingredients that not only taste great but also provide health benefits. I gave step-by-step instructions to make your ice cream smooth and creamy. Tips helped you choose the best bananas and blend effectively. We looked at fun variations for flavor and how to store your treats properly.
Making vegan ice cream is simple and rewarding. Enjoy your creation and share it with other